A html email signature is a very valuable tool to increase brand interaction with your email recipients by incorporating clickable images and text links as part of your email signature displayed prominently on the bottom of every email message you send.
Create a HTML email signature
Simply make an order on the Pricing page and fill out the short Signature Info Form. We will take care of the rest from there. After the html email signature is created and emailed to you, follow the instructions on this page to get your html email signature installed. Click Install Instructions to see our list of instruction guides for the most commonly used email apps.
Installation Instructions
Before you continue, check the following:
- Using Apple Mail on macOS Catalina 10.15
Have a proper HTML email signature file or…
Ordered a signature design package on our Pricing page
STEP 1: Create a new signature
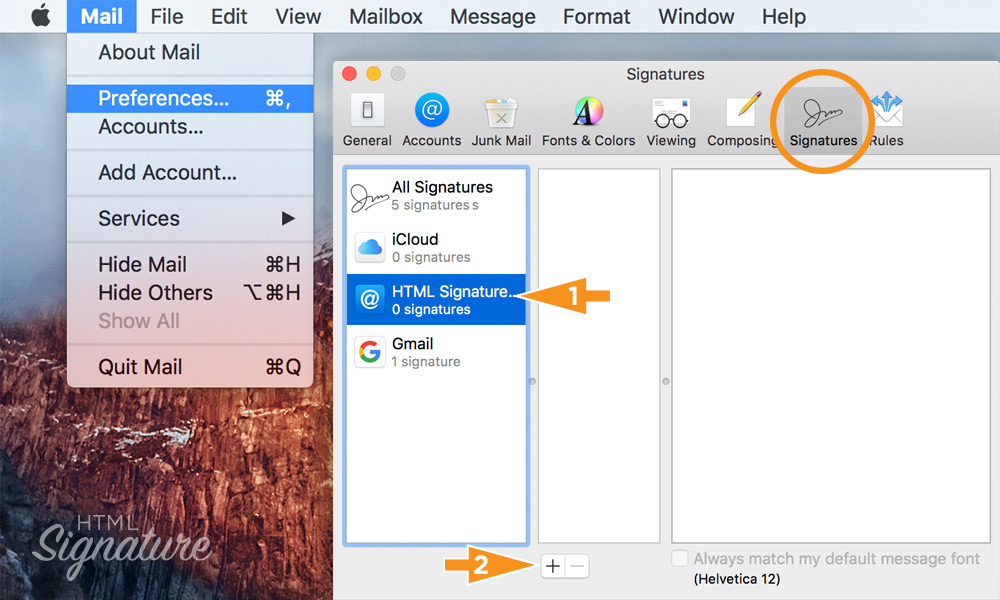
Go to Mail > Preferences… > Signatures. Select the email account you want to use the new signature with (1). Click on the “+” to add a new signature (2).
STEP 2: Set up new signature
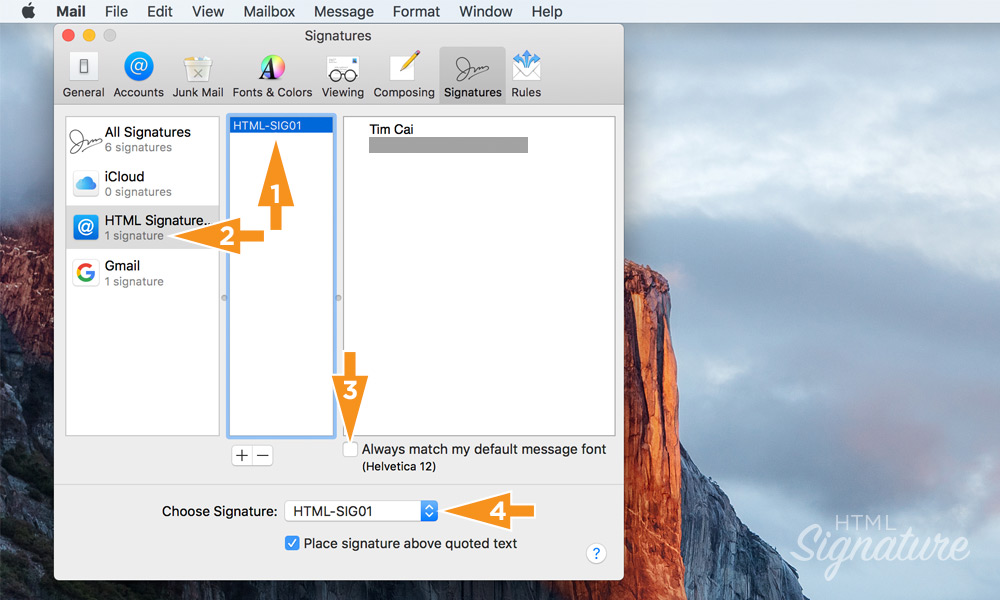
Give the new signature a name. We will name it “HTML-SIG01” in this example (1). Note that the number of signatures have increased by one under your email account (2). Uncheck box for “Always match my default message font” (3). Make sure the new signature is selected for “Choose Signature” so it will show up automatically when you compose a new message (4). Close window and quit Mail.
STEP 3: Check Mail settings for Viewing
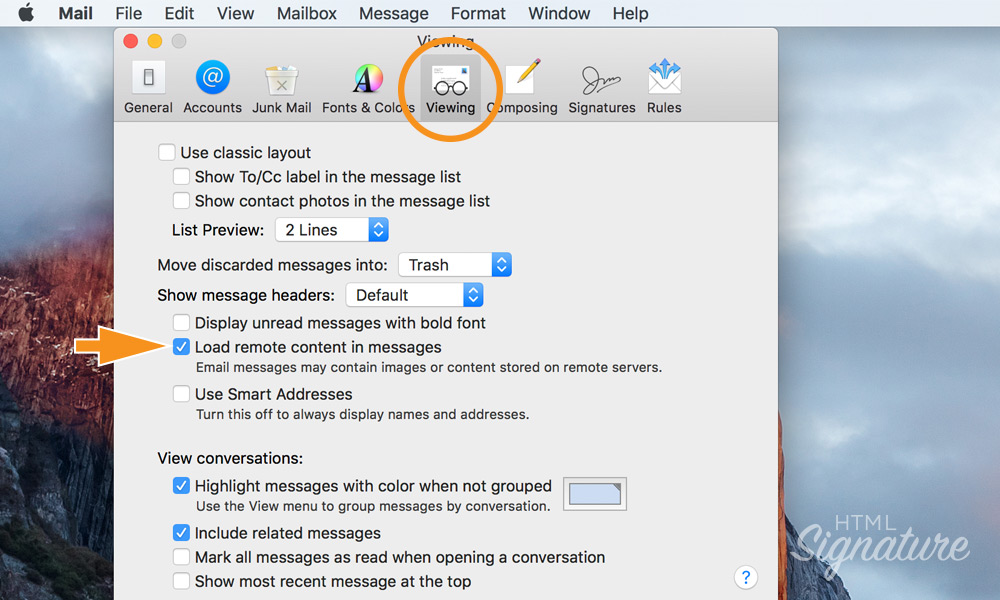
Go to Mail > Preferences… > Viewing. Check box for “Load remote content in messages”
STEP 4: Check Mail settings for Composing
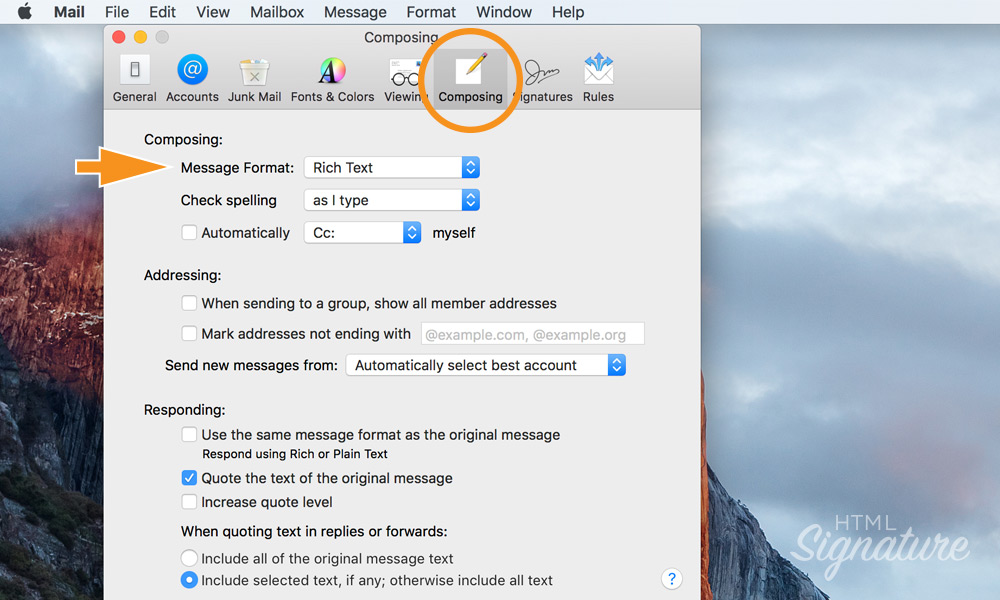
Go to Mail > Preferences… > Composing. Select Rich Text for “Message Format”
STEP 5: Copy HTML email signature code
Open your HTML email signature file with TextEdit. Select all (Command+A) and copy (Command+C) the HTML code. You will receive a HTML file from us if you ordered a signature on our website. Contact us if you didn’t receive any file from us.
If you see your HTML email signature design instead of HTML code, go to TextEdit > Preferences… > Open and Save (1). Check the box for “Display HTML files as HTML code instead of formatted text” (2). Quit and reopen your HTML email signature file with TextEdit again to do the select all and copy.

STEP 6: Open Mail Signatures folder
Go to Finder > Go > Library (Press and hold the option key to reveal on menu) > Mail > V7 > MailData > Signatures.

STEP 7: Locate Placeholder signature file
To find the placeholder signature you just created, select “Detailed View” for View (1). Click on “Date Modified” to have the most recent files display on top (2). The file with a “.mailsignature” extension nearest to the top is your placeholder signature (3).

STEP 8: Update Placeholder signature file
Select and delete everything under the “Mime-Version…” line (below the orange line). Paste the HTML code copied to your clipboard earlier into the space.

STEP 9: Lock updated signature file
To save the changes just made, Click on “Edited” next to the file name on the upper right corner to reveal a pop-up window (1). Check box for “Locked” and quit TextEdit (2).

STEP 10: Test HTML email signature in Mail
Open Mail and compose a new message. The new html email signature will appear automatically. If the HTML email signature doesn’t show, make sure the correct email account is selected from the “From” menu (1). And check if the correct signature is selected in the “Signature” menu if you have more than one signature installed (2).

Congratulations! You have completed the installation.
Hope you were able to get your HTML email signature installed smoothly using this installation guide. Comment below to share any problem you may have installing your HTML email signature. We will try my best to assist or maybe a fellow reader may. Write us a message for more help.
Post Date: March 9th, 2018



Leave A Comment